
The #1 Beginner Mistake: A Step-by-Step Guide on How to Plant Anubias Correctly
Anubias is renowned as one of the hardiest and most forgiving plants in the aquarium hobby, making it a top recommendation for beginners. Yet, countless newcomers find their beautiful new Anubias turning yellow, melting, and dying within a few months. The cause is almost always the same: a simple but critical planting error. This guide will expose the #1 beginner mistake and provide you with a clear, step-by-step guide on the correct way to plant your Anubias to ensure it thrives for years to come.
The Mistake: Burying the Rhizome
The single biggest mistake a beginner can make with an Anubias is treating it like a typical stem plant. New hobbyists often take the plant and bury its base deep into their sand or gravel substrate. This will kill the plant.
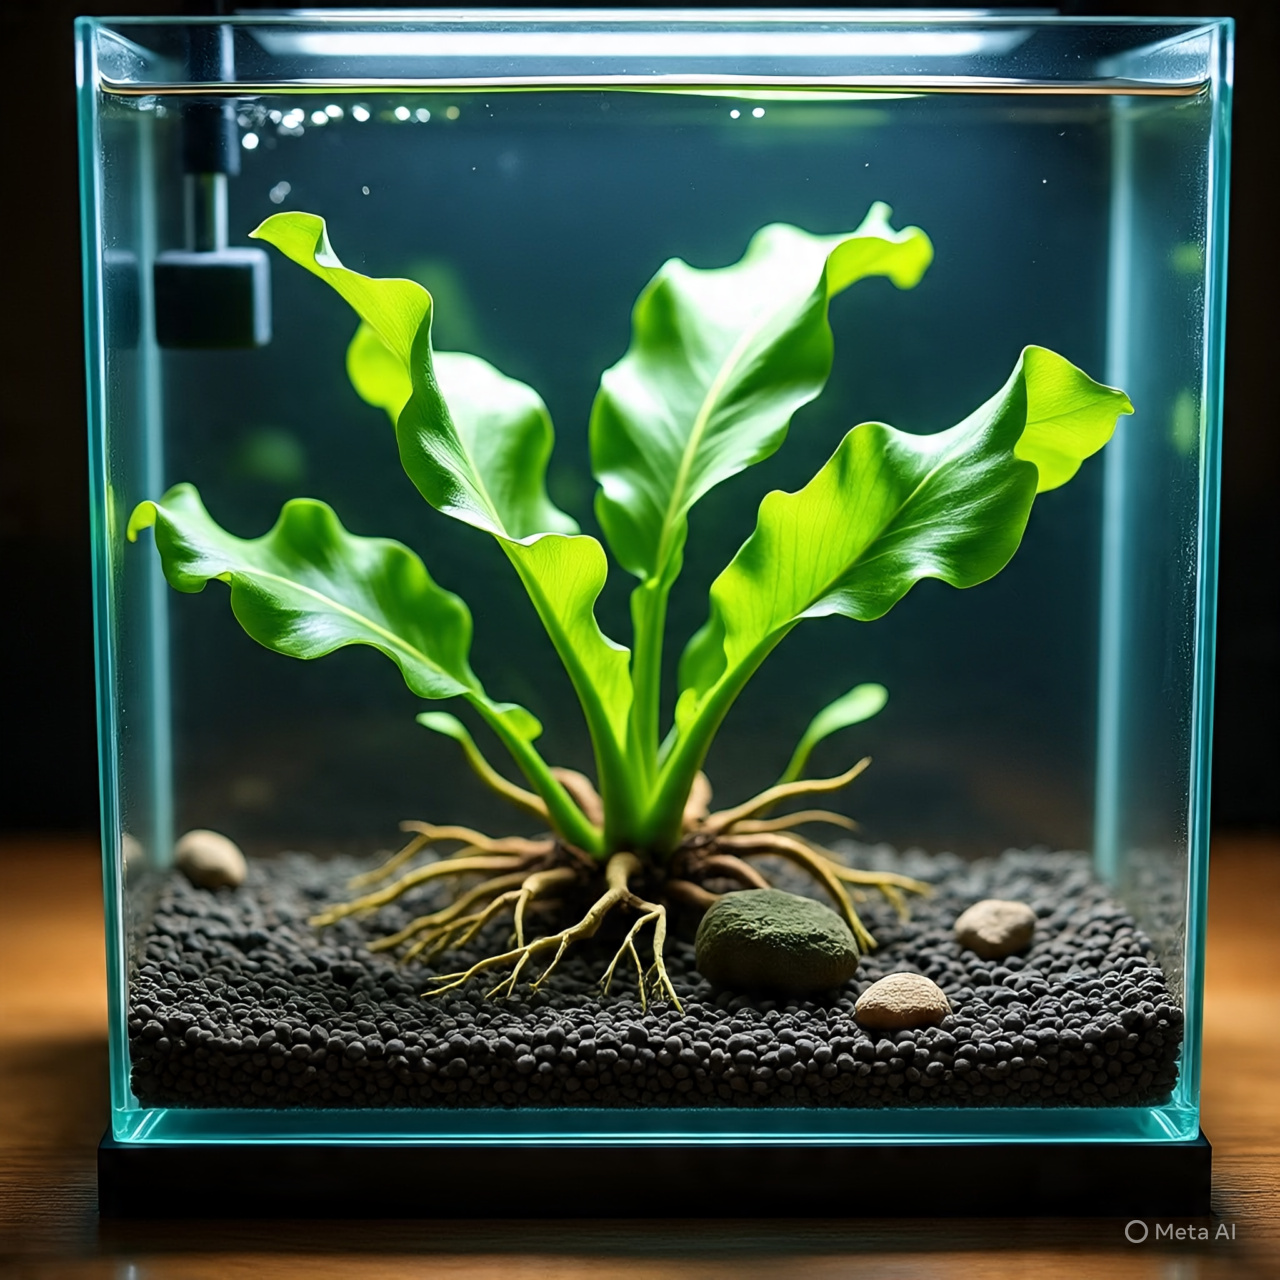
The thick, horizontal stem that the leaves and roots grow from is called the rhizome. This is the life-support system of the plant. Unlike the roots of a stem plant, the rhizome is not designed to be buried. It needs to be exposed to the open, oxygenated water to “breathe” and function properly. When you bury the rhizome, you suffocate it. This creates an anaerobic (oxygen-deprived) environment, which leads to a deadly bacterial infection known as rhizome rot. The rhizome will turn soft and mushy, and the entire plant will fall apart.
The Golden Rule of Planting Anubias
The rule is simple and absolute: NEVER bury the rhizome. The thin, stringy roots that grow downwards from the rhizome can go into the substrate, but the thick rhizome itself must always remain above the gravel or sand.
To achieve this, we don’t “plant” Anubias in the traditional sense. Instead, we “attach” it to hardscape elements in the aquarium.
The Correct Methods for Planting Anubias
Here are the two best and most popular methods for correctly securing your Anubias in your aquascape.
Method 1: The Super Glue Gel Method (Fast and Easy)
This is the preferred method for most aquascapers due to its speed and clean look. It is completely safe for all aquarium inhabitants, including fish and shrimp.
- Gather Your Supplies: You will need your Anubias plant, your chosen piece of driftwood or rock, and a tube of cyanoacrylate-based super glue GEL. The “gel” formulation is crucial as it is thick and won’t run everywhere.
- Prepare the Plant and Hardscape: Take both the plant and the hardscape item out of the water. Pat the specific attachment point on the rock or wood dry with a paper towel. A dry surface helps the glue bond instantly.
- Apply a Small Amount of Glue: Apply a few small dabs of the super glue gel directly onto the underside of the Anubias rhizome or onto the hardscape itself. You do not need a lot; a little goes a long way.
- Press and Hold: Firmly press the rhizome onto the desired spot on the hardscape and hold it in place for 20-30 seconds. The gel will create a strong, instant bond.
- Place in Aquarium: You can now immediately place the hardscape with the attached Anubias back into your aquarium. The glue cures instantly upon contact with water.
Method 2: The Fishing Line or Thread Method (Traditional and Secure)
This traditional method is also extremely effective and is preferred by those who don’t like using glue in their tanks.
- Gather Your Supplies: You will need your Anubias, your hardscape, and a spool of dark-colored fishing line or 100% cotton thread.
- Position the Plant: Place the Anubias on the desired spot on your driftwood or rock.
- Tie it Down: Take the fishing line or thread and wrap it around the hardscape and over the rhizome several times to secure it firmly. Be careful not to tie it so tightly that you crush the rhizome. Tie a secure knot.
- Trim the Excess: Cut off the excess line or thread.
- Place in Aquarium: Place the entire piece back into your tank. Over several months, the Anubias’s own roots will grow and wrap around the hardscape, anchoring it permanently. If you used cotton thread, it will naturally dissolve and disappear over time. Fishing line will need to be manually cut away later if you wish to remove it.
By avoiding the simple mistake of burying the rhizome, you are guaranteeing your Anubias has the best possible chance of survival. This single piece of knowledge is the difference between a dying plant and a thriving centerpiece that will grace your aquarium for years. Whether you choose the glue or thread method, attaching your Anubias to hardscape is the true secret to long-term success.